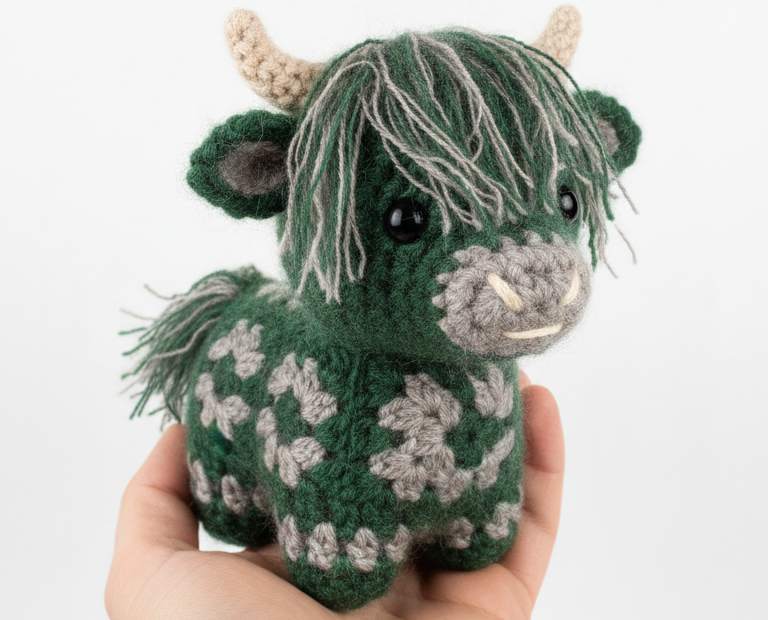
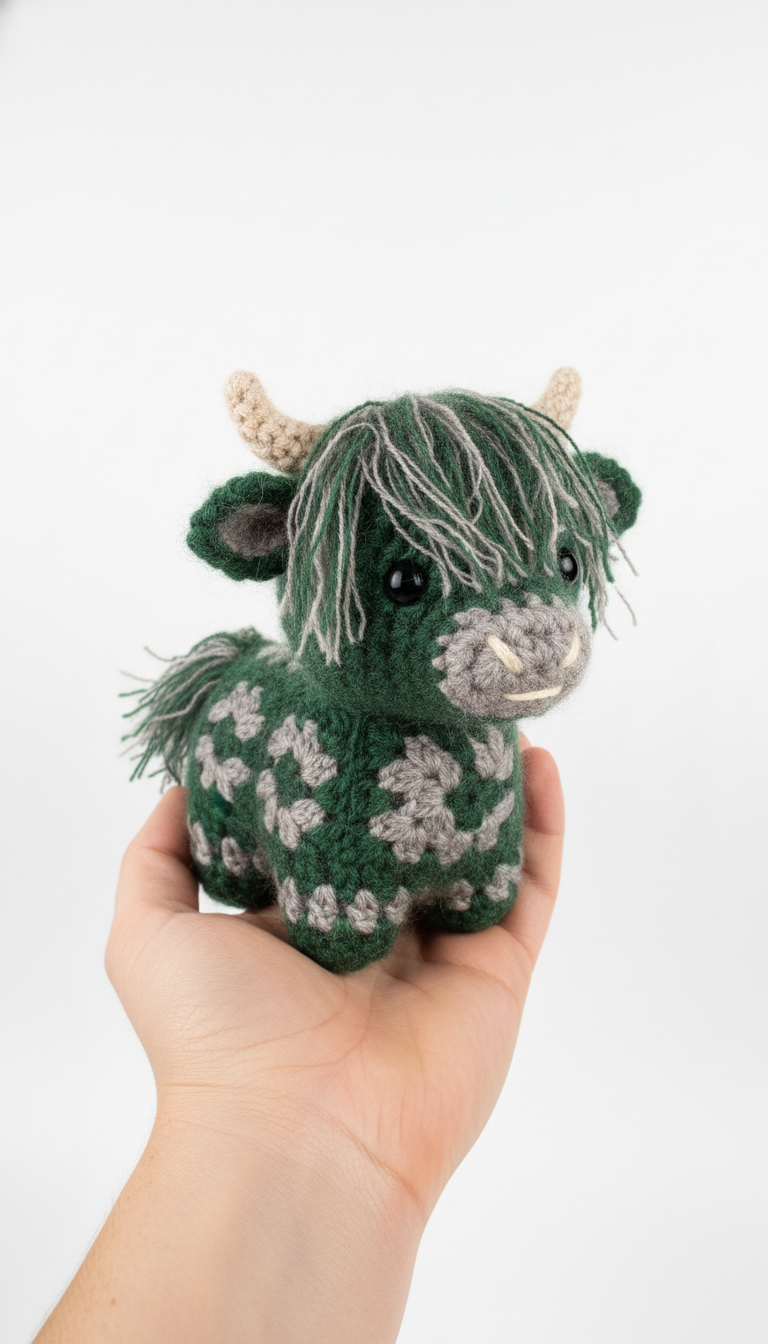
Get ready to create the most charming little creature with our Amigurumi Highland Cow crochet pattern! This adorable coo, with its shaggy fringe, tiny horns, and speckled green coat, brings a touch of rustic cuteness to any space. Perfect for seasoned crocheters and adventurous beginners, this project will have you falling in love with every stitch. Craft a unique gift or a sweet companion for yourself!
Why You’ll Adore Crafting This Highland Coo
There’s something incredibly satisfying about bringing a miniature creature to life with your own hands. This Highland Cow isn’t just a pattern; it’s an opportunity to create a treasured handmade item. Its unique textured look and endearing expression make it an instant favorite, whether it’s gracing a shelf, joining a toy collection, or becoming a beloved desk buddy. Plus, it’s a fantastic way to practice color changes and fuzzy detailing!
Crochet Pattern: Moo-ve Over, Cuteness! Crochet Your Own Amigurumi Highland Cow
Materials
Worsted weight yarn in Dark Green (MC)
Worsted weight yarn in Light Grey (CC1)
Worsted weight yarn in Beige/Light Brown (CC2)
2 safety eyes (approx. 6mm)
Crochet hook (e.g., 3.0mm or size suitable for yarn to achieve tight fabric)
Fiberfill for stuffing
Yarn needle
Stitch markers
Scissors
Abbreviations
MR: Magic Ring
ch: chain
sc: single crochet
inc: increase (2 sc in one stitch)
dec: decrease (sc2tog)
sl st: slip stitch
FO: Fasten off
(X): Stitch count at the end of the round/row
Instructions
Head (MC – Dark Green)
R1: Start with MC. 6 sc in MR. (6)
R2: 6 inc. (12)
R3: (1 sc, inc) x6. (18)
R4: (2 sc, inc) x6. (24)
R5: (3 sc, inc) x6. (30)
R6-9: 30 sc. (4 rounds)
R10: (3 sc, dec) x6. (24)
Insert safety eyes between R7 and R8, about 6 stitches apart.
R11: (2 sc, dec) x6. (18)
Start stuffing firmly.
R12: (1 sc, dec) x6. (12)
R13: 6 dec. (6)
FO, leaving a long tail for sewing. Finish stuffing.
Snout (CC1 – Light Grey)
R1: 6 sc in MR. (6)
R2: 6 inc. (12)
R3: (1 sc, inc) x6. (18)
R4-5: 18 sc. (2 rounds)
FO, leaving a long tail for sewing. Lightly stuff.
Embroider two small “nostrils” with a short length of white or CC1 yarn on R3-4.
Ears (Make 2, MC – Dark Green)
R1: 6 sc in MR. (6)
R2: (1 sc, inc) x3. (9)
R3: 9 sc. (9)
Flatten and sl st across the opening to close. FO, leaving a tail for sewing.
Horns (Make 2, CC2 – Beige/Light Brown)
R1: 4 sc in MR. (4)
R2: (1 sc, inc) x2. (6)
R3: 6 sc. (6)
Lightly stuff. FO, leaving a tail for sewing.
Body (MC – Dark Green with CC1 – Light Grey spots)
For spots, carry CC1 yarn and randomly switch to CC1 for 2-4 sc stitches, then switch back to MC. Work spots irregularly on different rounds to mimic the image. When changing colors, pull through the last loop of the stitch with the new color.
R1: Start with MC. Ch 7. Sc in 2nd ch from hook, 4 sc, 3 sc in last ch. Turn to work on other side of ch. 5 sc. (13)
FO, leaving a long tail. Close the opening and weave in the end.
Assembly:
Sew the Snout to the front of the Head, centering it below the eyes.
Sew the Head to the Body.
Attach the Ears to the top sides of the Head, slightly behind the eyes.
Attach the Horns just behind the Ears.
Forelock (CC1 – Light Grey): Cut several 6-inch strands of CC1 yarn (and optionally a few MC strands for depth). Using your hook, loop and knot these strands between the eyes and around the forehead area, creating a shaggy fringe that covers the eyes, just like a Highland Cow. Trim to desired length.
Tail (MC & CC1): Cut a few 3-inch strands of MC and CC1 yarn. Attach them to the back of the body where the tail should be, knotting securely. Trim to desired length for a small tuft.