Get ready to power up your crochet hook and bring a classic video game hero to life! This Amigurumi Mega Man pattern lets you craft your very own tiny robot master. Perfect for fans of the iconic blue bomber, this project is designed to capture all the charm and nostalgia of Mega Man in a huggable, yarn-filled form. Stitch your way to a super-cute collectible!
Craft Your Own Pixelated Pal: Why You Need This Mega Man Amigurumi
Creating an Amigurumi Mega Man is more than just making a doll; it’s a journey back to the golden age of gaming. Imagine the joy of gifting this handmade hero to a fellow fan or displaying it proudly on your desk. This pattern empowers you to personalize your favorite character, turning simple strands of yarn into a beloved symbol of courage and adventure. Let your creativity blast off!
Crochet Pattern: Power Up Your Stash: Adorable Amigurumi Mega Man Crochet Pattern
Materials
DK weight yarn in: Dark Blue (main helmet, body, arms), Light Blue (stripes, legs, helmet details), Peach (face), Red (boots), Black (eyes, embroidery), White (eye sparkle), Light Grey (arm cuffs)
2.5mm or 3.0mm crochet hook (or size to achieve tight stitches)
6mm safety eyes
Polyester fiberfill for stuffing
Yarn needle
Scissors
Stitch markers (optional)
Abbreviations
MR: Magic Ring
sc: Single Crochet
inc: Increase (2 sc in one stitch)
dec: Decrease (single crochet two together)
sl st: Slip Stitch
ch: Chain
st(s): Stitch(es)
FO: Fasten Off
(…) x N: Repeat instructions in parentheses N times
[…]: Total number of stitches at the end of the round
Instructions
Important Note: Work in continuous rounds unless otherwise specified. Use a stitch marker to keep track of the first stitch of each round.
Head (Peach Yarn)
R1: MR 6sc [6]
R2: inc x 6 [12]
R3: (sc, inc) x 6 [18]
R4: (2sc, inc) x 6 [24]
R5: (3sc, inc) x 6 [30]
R6: (4sc, inc) x 6 [36]
R7-12: sc around [36] (6 rounds)
Attach safety eyes between R10 and R11, about 6-7 sts apart.
R13: (4sc, dec) x 6 [30]
R14: (3sc, dec) x 6 [24]
R15: (2sc, dec) x 6 [18]
Start stuffing firmly.
R16: (sc, dec) x 6 [12]
R17: dec x 6 [6]
FO, weave in ends and close hole.
Helmet (Dark Blue Yarn)
R1: MR 6sc [6]
R2: inc x 6 [12]
R3: (sc, inc) x 6 [18]
R4: (2sc, inc) x 6 [24]
R5: (3sc, inc) x 6 [30]
R6: (4sc, inc) x 6 [36]
R7-10: sc around [36] (4 rounds)
R11: sc in first 10 sts, ch 10, skip next 10 sts, sc in next 16 sts [26 sc + 10 ch]
R12: sc in first 10 sts, sc 10 into the chain-space, sc in next 16 sts [36]
R13-14: sc around [36] (2 rounds)
R15: (4sc, dec) x 6 [30]
R16: (3sc, dec) x 6 [24]
FO, leave a long tail for sewing.
Body (Dark Blue, Light Blue Yarn)
Start with Dark Blue yarn.
R1: MR 6sc [6]
R2: inc x 6 [12]
R3: (sc, inc) x 6 [18]
R4: (2sc, inc) x 6 [24]
R5: (3sc, inc) x 6 [30]
R6-7: sc around [30] (2 rounds)
Change to Light Blue yarn.
R8: sc around [30]
Change to Dark Blue yarn.
R9: sc around [30]
Change to Light Blue yarn.
R10: sc around [30]
Change to Dark Blue yarn.
R11-13: sc around [30] (3 rounds)
R14: (3sc, dec) x 6 [24]
R15: sc around [24]
Stuff body firmly. FO, leave a long tail for sewing.
Stuff leg lightly. FO, leave a long tail for sewing.
Helmet Ear Flaps (Light Blue Yarn) – Make 2
Ch 6.
R1: sc in 2nd ch from hook, sc in next 3 ch, 3sc in last ch. Working on the other side of the chain, sc in next 3 sts, 2sc in last st. [12]
Sl st to first sc. FO, leave a tail for sewing.
Helmet Top Squares (Light Blue Yarn) – Make 2
Ch 4.
R1: sc in 2nd ch from hook, sc in next 2 ch. Ch 1, turn. [3]
R2-3: sc in each st across. Ch 1, turn. [3]
FO, leave a tail for sewing.
Arm Details (Light Blue Yarn) – Make 2
Ch 3.
R1: sc in 2nd ch from hook, sc in next ch. [2]
FO, leave a tail for sewing.
Assembly
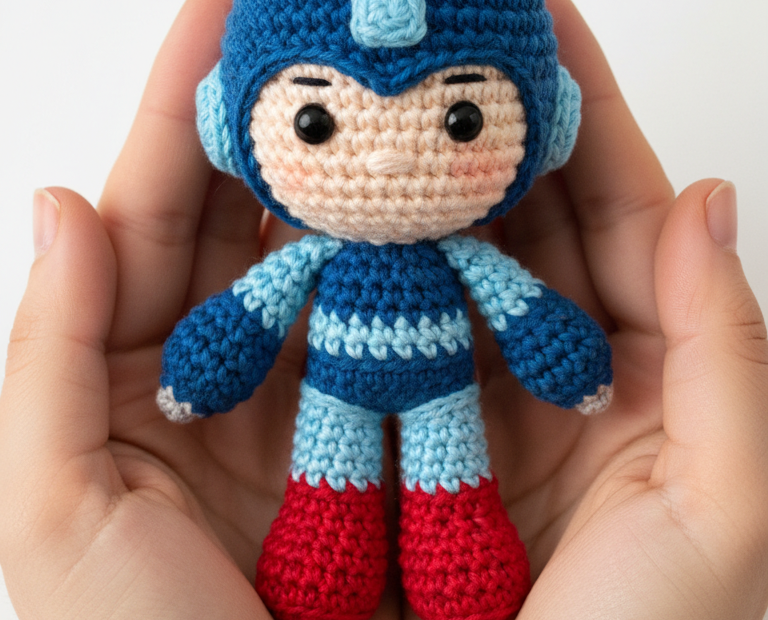
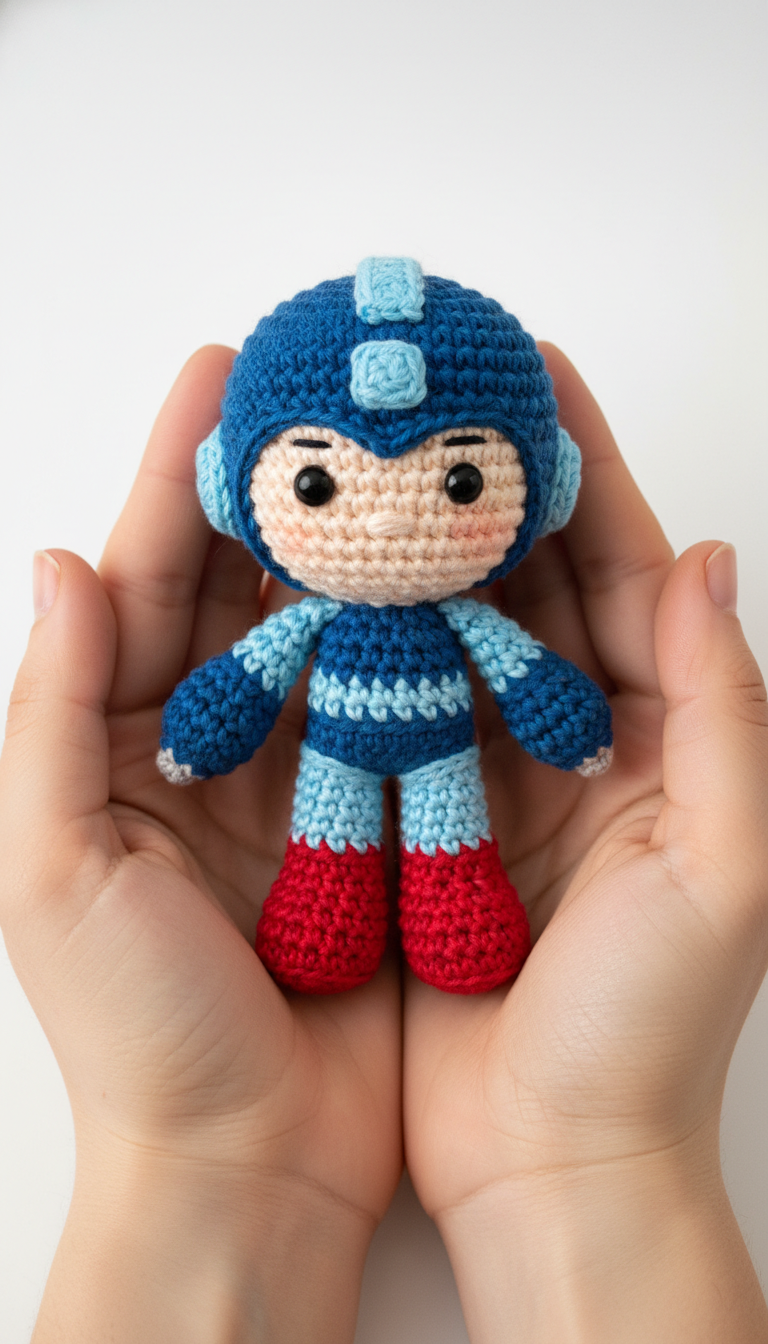
Head & Helmet: Carefully position and sew the dark blue helmet onto the peach head, ensuring the face opening frames the safety eyes. Stitch securely all around the opening and the base of the helmet.
Head to Body: Sew the head securely onto the top of the body.
Arms: Sew the arms to the sides of the body, just below the neck. Ensure the light blue stripe is facing forward.
Legs: Sew the legs to the bottom of the body, evenly spaced so Mega Man can stand (or sit).
Helmet Details: Sew the two light blue ear flaps to the sides of the helmet. Sew the two light blue top squares onto the top of the helmet, slightly raised as seen in the image.
Arm Details: Sew the small light blue arm details onto the front/side of the upper arms.
Embroider Details: Using black embroidery floss, embroider small lines above the safety eyes for eyebrows. Using white embroidery floss, embroider a small dot or line on each safety eye for a sparkle. With pink embroidery floss or blush, add small blush marks on the peach cheeks.