Unleash your inner Saiyan with this exciting crochet pattern to create your very own Super Saiyan Goku amigurumi! Perfect for Dragon Ball Z fans and anime lovers, this detailed guide will walk you through crafting the iconic hero in his powerful, spiky-haired form. Get ready to power up your crochet skills and bring a legendary warrior to life with yarn and hook!
Craft a Dragon Ball Z Legend with This Amigurumi Pattern
Imagine gifting this adorable, handmade Goku to a fellow fan, or proudly displaying it as a testament to your crafting prowess! This pattern offers a rewarding challenge for intermediate crocheters and provides clear instructions to ensure your finished amigurumi truly captures the essence of Super Saiyan Goku. It’s more than just a toy; it’s a piece of fandom art you create with your own hands.
Crochet Pattern: Power Up Your Stash: Crochet Your Own Super Saiyan Goku Amigurumi!
Materials
Worsted weight yarn in: Bright Orange (for uniform), Dark Blue (for undershirt, wristbands, boots, belt), Light Beige/Peach (for skin), Black (for eyes), Red (for belt accent), Pink (for cheeks)
2.5mm or 3.0mm crochet hook (or size suitable for your yarn to achieve tight stitches)
6mm black safety eyes
Polyester fiberfill for stuffing
Tapestry needle
Stitch markers
Scissors
Abbreviations
MR: Magic Ring
ch: chain
sc: single crochet
inc: single crochet increase (2 sc in one stitch)
dec: single crochet decrease (sc 2 together)
sl st: slip stitch
FO: fasten off
[…] x N: repeat instructions in brackets N times
(N): total number of stitches in the round/row
Instructions
Notes: This pattern is worked in continuous rounds unless otherwise specified. Use a stitch marker to mark the first stitch of each round.
Head & Body (Start with Skin Tone Yarn)
R1: 6 sc in MR (6)
R2: [inc] x 6 (12)
R3: [sc, inc] x 6 (18)
R4: [2 sc, inc] x 6 (24)
R5: [3 sc, inc] x 6 (30)
R6: [4 sc, inc] x 6 (36)
R7-R13: sc around (36) – 7 rounds
R14: [4 sc, dec] x 6 (30)
R15: [3 sc, dec] x 6 (24)
Insert safety eyes between R10 and R11, about 6-7 stitches apart. Begin stuffing the head firmly.
R16: [2 sc, dec] x 6 (18)
R17 (Neck): sc around (18)
Switch to Dark Blue Yarn for Undershirt
R18: [2 sc, inc] x 6 (24)
R19: [3 sc, inc] x 6 (24)
R20-R22 (Dark Blue): sc around (30) – 3 rounds
Switch to Bright Orange Yarn for Uniform Top
R23-R27 (Bright Orange): sc around (30) – 5 rounds
Switch to Dark Blue Yarn for Belt Band
R28 (Dark Blue): sc around (30) – 1 round
Switch to Bright Orange Yarn for Pants
R29-R33 (Bright Orange): sc around (30) – 5 rounds
Continue stuffing body firmly.
R34: [3 sc, dec] x 6 (24)
R35: [2 sc, dec] x 6 (18)
R36: [sc, dec] x 6 (12)
R37: [dec] x 6 (6)
FO, close opening and weave in ends.
Arms (Make 2)
Start with Skin Tone Yarn
R1: 6 sc in MR (6)
R2-R3 (Skin Tone): sc around (6)
Switch to Dark Blue Yarn
R4 (Dark Blue): sc around (6)
Switch to Bright Orange Yarn
R5-R8 (Bright Orange): sc around (6)
Stuff lightly. Sl st, FO, leaving a long tail for sewing.
Legs/Boots (Make 2)
Start with Dark Blue Yarn
R1: 6 sc in MR (6)
R2: [inc] x 6 (12)
R3-R5 (Dark Blue): sc around (12)
Switch to Bright Orange Yarn
R6-R9 (Bright Orange): sc around (12)
Stuff lightly. Sl st, FO, leaving a long tail for sewing.
Hair Spikes (Bright Orange Yarn)
Make several spikes of varying sizes. Stuff lightly as you go.
Small Spike (Make 6-8):
R1: 4 sc in MR (4)
R2: [sc, inc] x 2 (6)
R3-R4: sc around (6)
R5: [sc, dec] x 2 (4)
FO, leave tail.
Medium Spike (Make 4-6):
R1: 5 sc in MR (5)
R2: [sc, inc] x 2, sc (7)
R3: sc around (7)
R4: [2 sc, inc] x 2, sc (9)
R5-R6: sc around (9)
R7: [sc, dec] x 3 (6)
FO, leave tail.
Large Spike (Make 2-3):
R1: 6 sc in MR (6)
R2: [sc, inc] x 3 (9)
R3-R4: sc around (9)
R5: [2 sc, inc] x 3 (12)
R6-R8: sc around (12)
R9: [sc, dec] x 4 (8)
FO, leave tail.
Belt Tie (Dark Blue Yarn)
ch 20-25 (adjust length to wrap around waist)
sc in 2nd ch from hook and across. (19-24 sc)
FO, leave a long tail.
Red Belt Accent (Red Yarn)
ch 4
sc in 2nd ch from hook and across. (3 sc)
ch 1, turn, sc 3.
FO, leave a tail.
Assembly
Facial Features:
Embroider a small smile with Black yarn below the eyes.
Embroider small pink blush spots on the cheeks with Pink yarn.
Attach Limbs:
Sew the arms to the sides of the body, just below the neck.
Sew the legs to the bottom of the body.
Attach Hair:
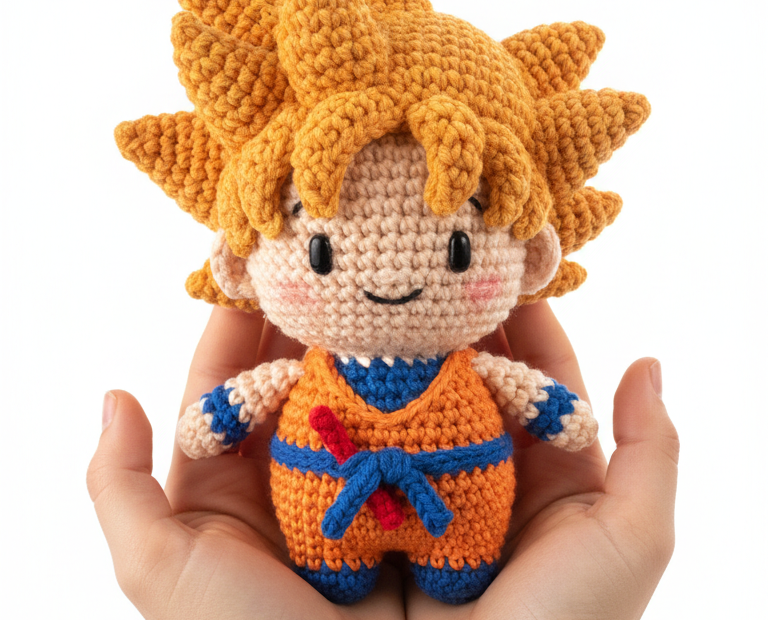
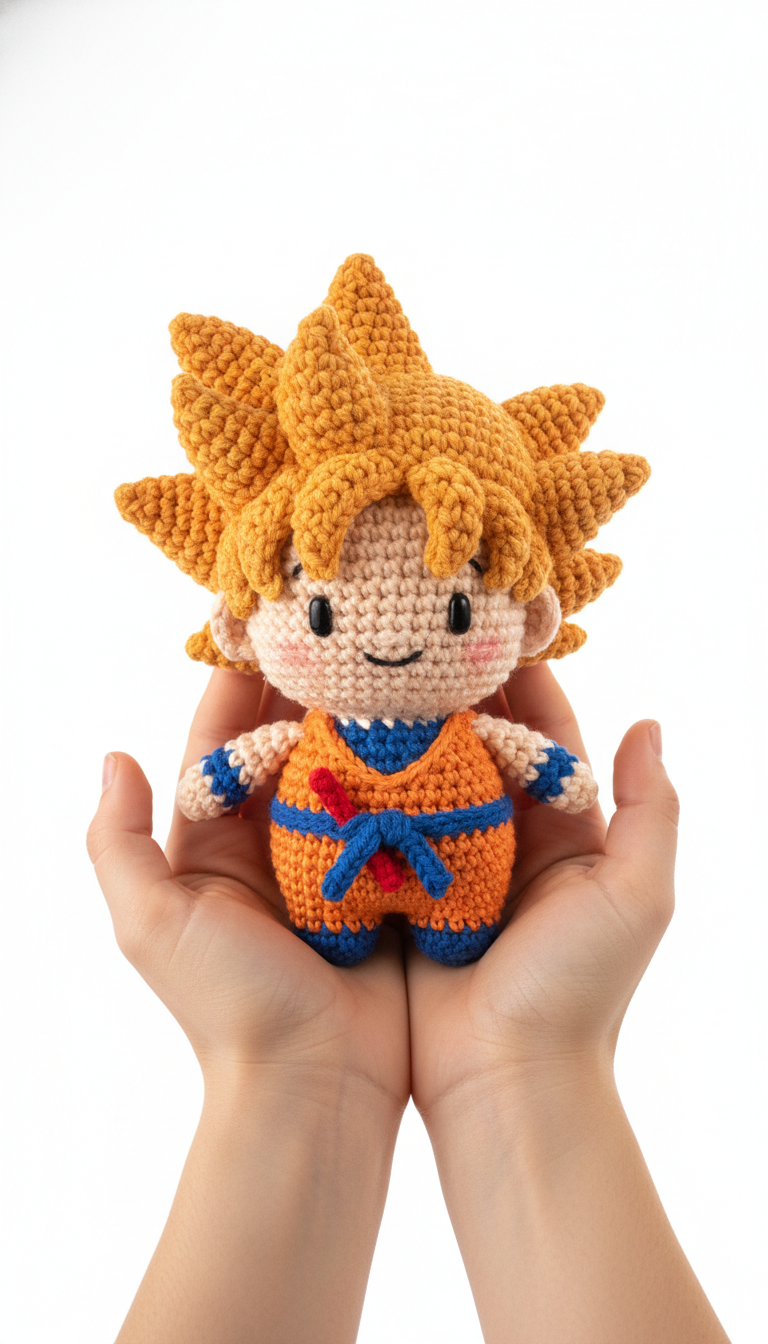
Arrange the hair spikes around the head, sewing them securely. Start with the larger spikes at the back and top, then fill in gaps with medium and small spikes, ensuring they point upwards and outwards as seen in the image.
Attach Belt:
Wrap the blue belt tie around the waist.
Sew the red accent piece onto the front of the blue belt tie, securing it in place.