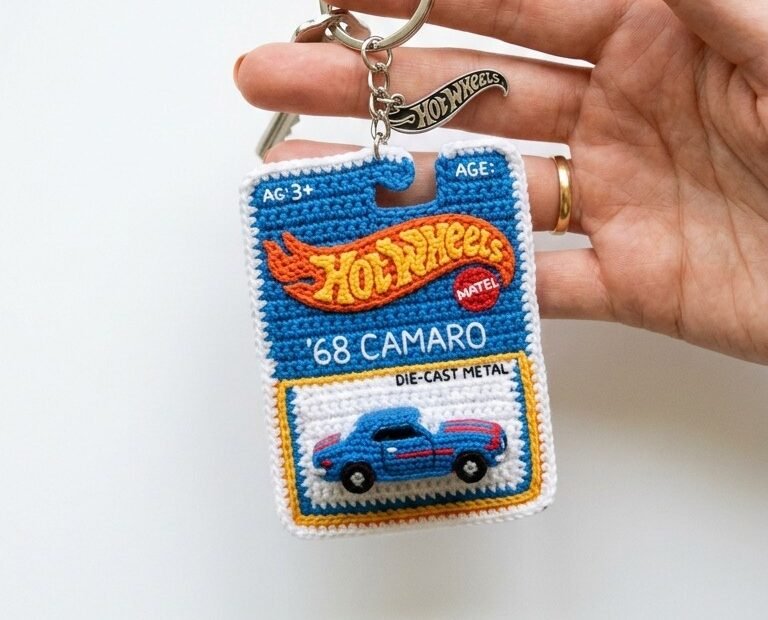
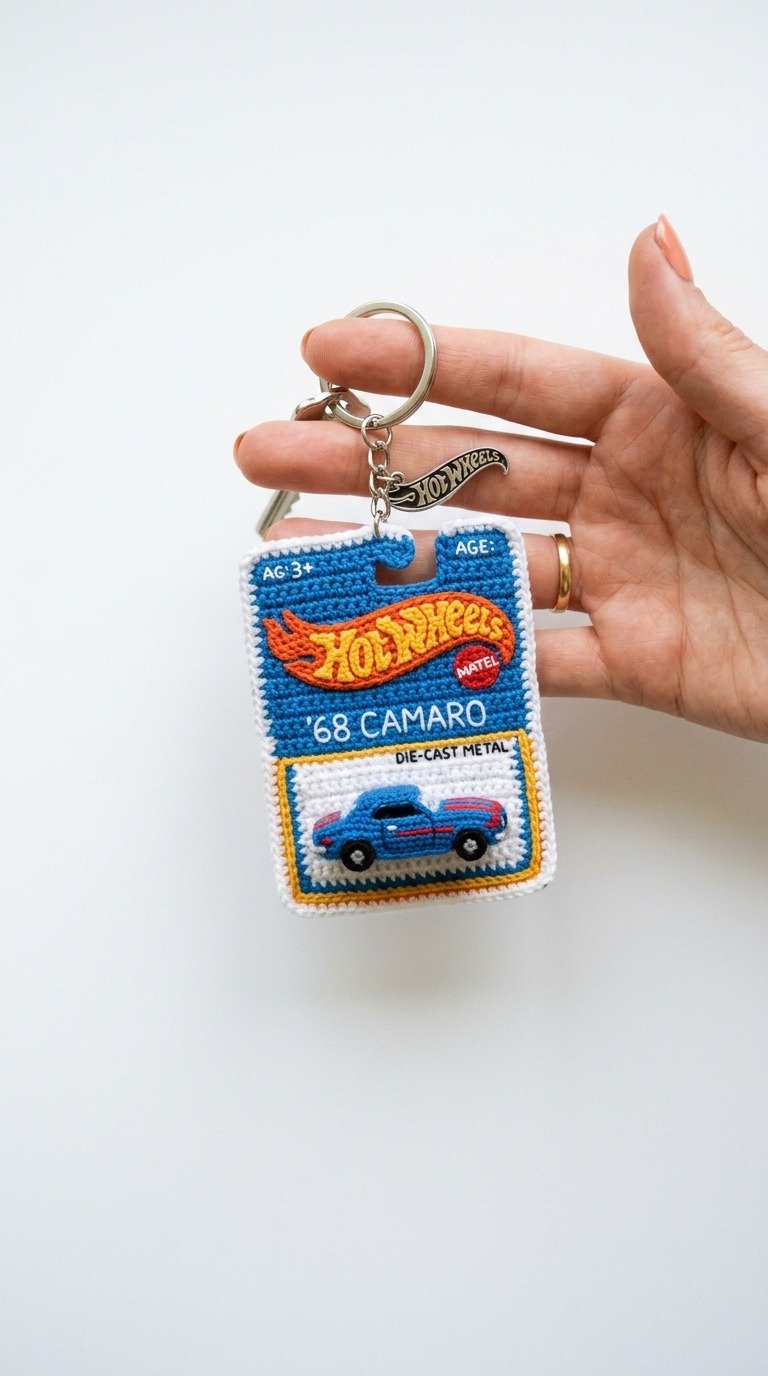
Crochet Pattern: Rev Up Your Style: Free Crochet Hot Wheels Keychain Pattern
Materials
- Embroidery floss or ultra-fine lace weight yarn in Royal Blue, White, Golden Yellow, Orange, Red, and Black
- 1.25 mm or 1.5 mm crochet hook
- Tapestry needle and fine sewing needle
- Keychain ring and link chain
- Fabric glue or stiffener (optional, to keep the card flat)
- Polyester fiberfill (a tiny pinch for the car)
Abbreviations
- ch – chain
- sc – single crochet
- inc – increase
- dec – decrease
- sl st – slip stitch
- st(s) – stitch(es)
- FL – front loop
- BL – back loop
Instructions
Step 1: The Backing Card (Make 2 – Front and Back Panels)
Using Royal Blue yarn, chain 26.
Row 1-28: Sc in second ch from hook and in each stitch across, turn, ch 1. (25 sts)
Row 29 (Creating the top hanger slot): Sc in first 8 sts, ch 9, skip 9 sts, sc in last 8 sts, turn.
Row 30: Sc in first 8 sts, work 9 sc in the ch-9 space, sc in last 8 sts, turn. (25 sts)
Row 31: Sc in each st across. Fasten off and weave in ends.
Step 2: The Inner Card Frame
Using White yarn, join at the bottom right corner of the front blue panel.
Work a neat surface slip stitch frame around the lower half of the blue card to outline the white toy-blister area (approximately 15 rows high and 21 stitches wide). Fill in the rectangle with rows of white single crochet, or crochet a separate white rectangle (15 rows by 21 stitches) and sew it onto the lower portion of the blue backing card. Border this white rectangle with a thin embroidered border of Golden Yellow thread.
Step 3: The Mini ’68 Camaro Applique
Using Royal Blue yarn, chain 11.
Row 1: Sc in second ch from hook and across. (10 sts)
Row 2: Sc across. (10 sts)
Row 3 (Cabin/Roof): Sl st in first 3 sts, ch 1, sc in next 4 sts, turn, leaving remaining sts unworked.
Row 4: Sc in the 4 cabin sts. Fasten off, leaving a tail for sewing.
Wheels (Make 2): Using Black yarn, make a magic ring and work 5 sc inside. Join with a sl st to the first st, fasten off, and sew onto the bottom of the car profile.
Add a tiny stripe of Red embroidery floss along the side of the car to replicate the classic Camaro racing stripes.
Step 4: Embroidery Details
Using Red and Orange embroidery floss, stitch the iconic flame-shaped ‘Hot Wheels’ logo onto the top portion of the blue card.
Using White embroidery floss, carefully embroider the letters ‘Hot Wheels’ over the red logo, and write ”68 CAMARO’ in block letters just below it.
Embroider ‘AG 3+’ in the top left corner, ‘AGE:’ in the top right corner, and ‘DIE-CAST METAL’ just above the car’s white frame.
Step 5: Assembly & Finishing
Place the decorated Front Panel and the plain Back Panel together, wrong sides facing.
Using White yarn, sc evenly around the outer edge of both panels to join them, working 3 sc in the corner stitches for a rounded look. Note: Be sure to slip stitch or sc neatly inside the hanger slot cutout to seal the gap.
Sew the tiny Camaro onto the white rectangle frame, stuffing it very lightly with a tiny pinch of fiberfill before sealing to give it a 3D pop.
Attach the metal keychain ring through the top hanger slot. Lightly mist with fabric stiffener if desired to help the card maintain its perfect rectangular shape.