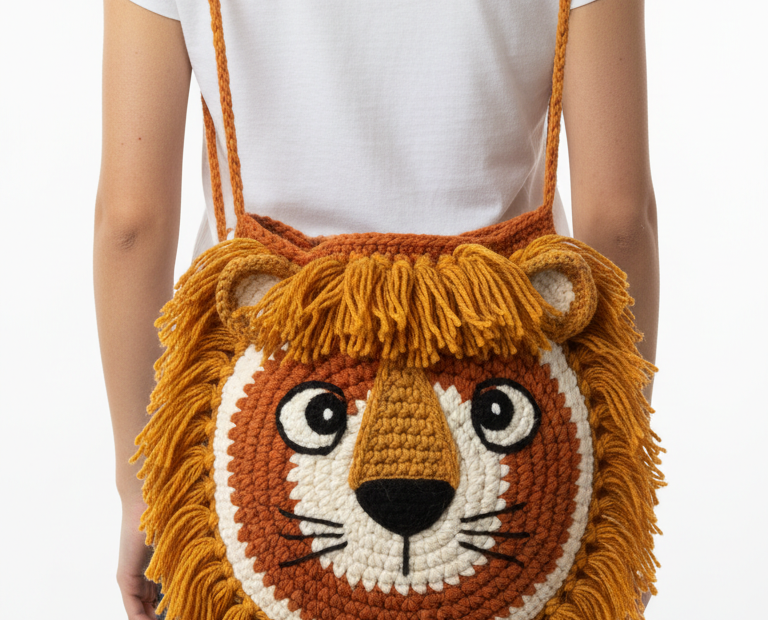
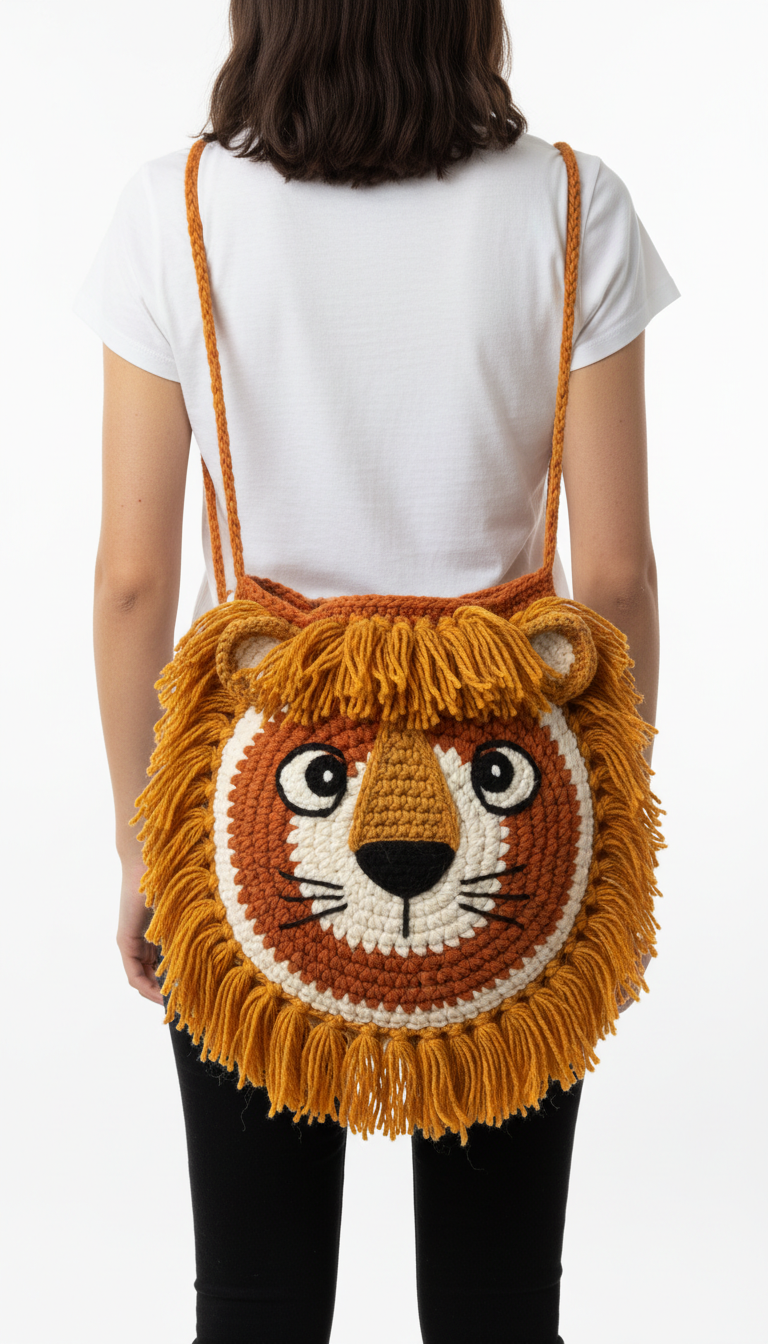
Unleash your wild side with this adorable crochet lion head crossbody bag! Perfect for carrying essentials or as a playful accessory, this pattern guides you through creating a charming lion face with a vibrant mane. It’s a fantastic project for intermediate crocheters looking to craft something truly unique and full of character. Get ready to turn heads with your very own handmade safari-inspired accessory!
Craft a Functional Piece with Fierce Charm
This crochet lion bag isn’t just cute; it’s also incredibly practical. It offers a unique way to express your creativity while making a usable item. Imagine the delight of a child (or an adult!) carrying their treasures in this whimsical pouch. It makes for an unforgettable gift or a cherished addition to your own accessory collection, blending playful design with handmade warmth.
Crochet Pattern: Roaringly Cute Crochet Lion Head Crossbody Bag Pattern
Materials
Worsted weight yarn in Rust/Terracotta (Color A)
Worsted weight yarn in Cream/Off-white (Color B)
Worsted weight yarn in Golden/Mustard Orange (Color C)
Worsted weight yarn in Black (Color D)
4.0mm (G) crochet hook
Yarn needle
Stitch markers
Scissors
Abbreviations
ch: chain
sl st: slip stitch
sc: single crochet
hdc: half double crochet
dc: double crochet
inc: increase (2 sc in one stitch)
dec: decrease (sc2tog)
MR: Magic Ring
FO: Fasten off
**: repeat instructions between asterisks
Instructions
This pattern is worked in continuous rounds unless otherwise specified. Use a stitch marker to mark the first stitch of each round.
Main Face (Make 2 – 1 Front, 1 Back)
Using Color A (Rust/Terracotta)
Round 1: Start with a MR, ch 1, 8 sc in MR. (8 sc)
Round 2: 2 sc in each st around. (16 sc)
Round 3: *1 sc, inc* around. (24 sc)
Round 4: *2 sc, inc* around. (32 sc)
Round 5: *3 sc, inc* around. (40 sc)
Round 6: *4 sc, inc* around. (48 sc)
Round 7: *5 sc, inc* around. (56 sc)
Round 8: *6 sc, inc* around. (64 sc)
Round 9: *7 sc, inc* around. (72 sc)
Round 10: *8 sc, inc* around. (80 sc)
Change to Color B (Cream/Off-white)
Round 11: *9 sc, inc* around. (88 sc)
Round 12: Sc in each st around. (88 sc)
For the first circle (Front Face), FO and weave in ends. For the second circle (Back Panel), do not FO, keep loop on hook if you plan to join immediately or FO and reattach later.
Muzzle (Nose Bridge)
Using Color C (Golden/Mustard Orange)
Row 1: Ch 7. Sc in 2nd ch from hook and next 4 ch, 3 sc in last ch. Working down other side of chain, sc in next 5 st. (13 sc)
Round 2: Sc in first 5 st, 3 sc in next st, sc in next 5 st, 3 sc in last st. (17 sc)
Sl st to first sc, FO, leaving a long tail for sewing.
Ears (Make 2)
Using Color C (Golden/Mustard Orange)
Row 1: Ch 7. Hdc in 2nd ch from hook and next 5 ch. (6 hdc)
Row 2: Ch 1, turn. Sc in each st across. (6 sc)
Fold in half and sl st to close the curved edge. FO, leaving a long tail for sewing.
Eyes (Make 2 White, 2 Black)
White part (Make 2) using Color B (Cream/Off-white)
Round 1: Start with a MR, ch 1, 6 sc in MR. (6 sc)
Round 2: 2 sc in each st around. (12 sc)
Sl st to first sc, FO, leaving a long tail for sewing.
Pupil (Make 2) using Color D (Black)
Round 1: Start with a MR, ch 1, 6 sc in MR. (6 sc)
Sl st to first sc, FO, leaving a long tail for sewing.
Strap
Using Color C (Golden/Mustard Orange)
Ch 200 (or to desired length), sc in 2nd ch from hook and across.
FO, leaving long tails for sewing.
Assembly
Attach Eyes: Sew the black pupils onto the white eye parts. Then, sew the assembled eyes onto the front face circle (Color A part), positioning them evenly.
Attach Muzzle: Sew the muzzle piece onto the front face, just below and slightly overlapping the eyes.
Embroider Nose and Whiskers: Using Color D (Black) yarn and a yarn needle, embroider a triangular nose on top of the muzzle. Then, embroider three whiskers on each side of the muzzle, extending towards the outer edge of the face.
Attach Ears: Position the ears on the top edge of the front face, slightly folding them so they stand up. Sew securely.
Create Mane Fringe: Cut numerous strands of Color C yarn, each about 6 inches long. Fold each strand in half, insert your hook into a stitch along the outer edge of the face (Color B round), pull the loop through, then pull the ends of the yarn through the loop to create a knot. Repeat this process, adding fringe densely around the entire perimeter of the front face. Trim the fringe to create an even, fluffy mane.
Join Front and Back Panels: Place the front and back circles together, wrong sides facing. Using Color C, sc through both layers around the perimeter, leaving a small opening (about 10-15 stitches) at the top for the bag opening. Before completely closing, ensure the mane fringe is nicely tucked between the layers.
Attach Strap: Sew each end of the strap securely to the top edges of the bag opening, on either side.