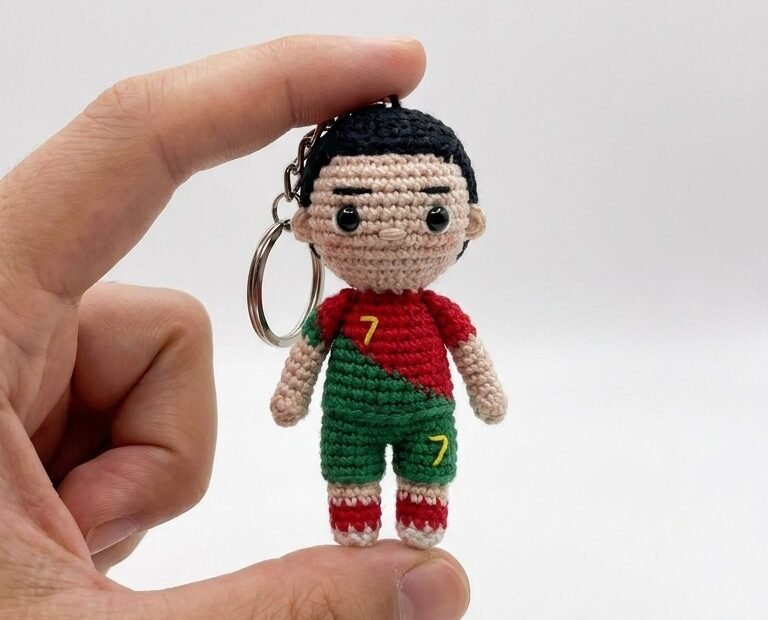
Get ready to create your very own pocket-sized football hero with this adorable Amigurumi Soccer Player Keychain pattern! Perfect for sports fans or as a unique gift, this mini crochet figure brings the excitement of the game to your fingertips. Follow our easy-to-understand instructions to craft a charming and detailed football star, complete with a classic kit and iconic number.
Craft Your Champion: A Perfect Amigurumi Gift for Football Fans!
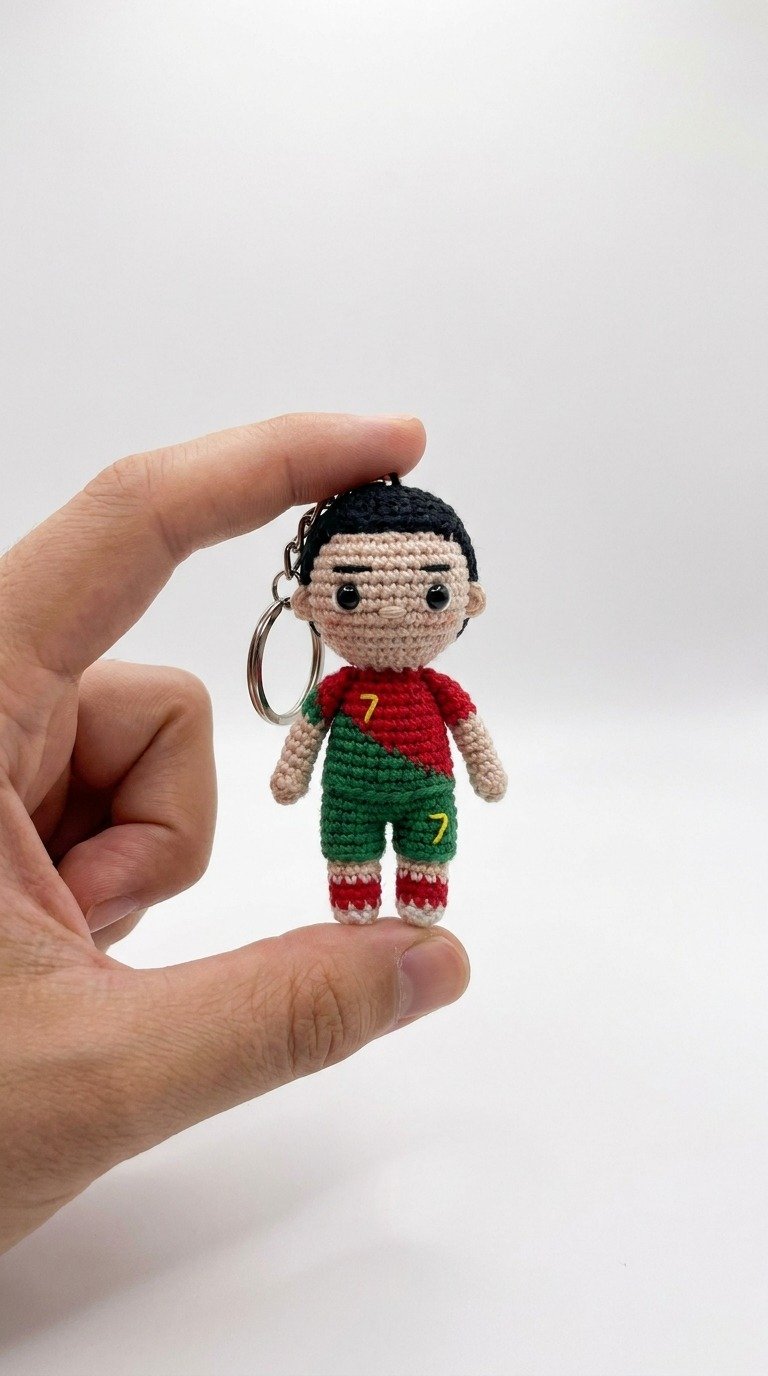
Whether you’re celebrating a favorite player, team, or just love cute crochet projects, this Amigurumi Soccer Player Keychain is a winner. Its compact size makes it ideal for attaching to keys, backpacks, or even as a desk buddy. Personalize it with different team colors or numbers to make it truly unique. It’s a delightful project that combines the joy of crochet with the passion for football.
Crochet Pattern: Score Big! Crochet Your Own Mini Football Star Keychain Amigurumi Pattern
Materials
Sport/DK weight yarn in Skin Tone (e.g., beige)
Sport/DK weight yarn in Black (for hair)
Sport/DK weight yarn in Red (for shirt/shoes)
Sport/DK weight yarn in Green (for shirt/shorts)
Sport/DK weight yarn in White (for socks)
Sport/DK weight yarn in Yellow (for number ‘7’ embroidery)
2.0mm Crochet Hook (or hook size appropriate for yarn)
Safety Eyes (6mm recommended, black)
Fiberfill for stuffing
Tapestry Needle
Stitch Markers
Scissors
Keychain ring with chain
Abbreviations
MR: Magic Ring
sc: Single Crochet
inc: Increase (2 sc in one stitch)
dec: Decrease (sc 2 stitches together)
ch: Chain
sl st: Slip Stitch
FO: Fasten Off
BLO: Back Loop Only
FLO: Front Loop Only
st(s): Stitch(es)
Instructions
Head (Skin Tone Yarn)
R1: MR 6 sc. (6)
R2: inc in each st around. (12)
R3: (sc, inc) x 6. (18)
R4: (2 sc, inc) x 6. (24)
R5: (3 sc, inc) x 6. (30)
R6-R11: sc around. (30) (6 rounds)
Insert safety eyes between R8 and R9, about 6-7 stitches apart.
R12: (3 sc, dec) x 6. (24)
R13: (2 sc, dec) x 6. (18)
Start stuffing firmly.
R14: (sc, dec) x 6. (12)
R15: dec x 6. (6)
FO, leaving a long tail to close the hole. Weave in end.
Hair (Black Yarn)
R1: MR 6 sc. (6)
R2: inc in each st around. (12)
R3: (sc, inc) x 6. (18)
R4: (2 sc, inc) x 6. (24)
R5: (3 sc, inc) x 6. (30)
R6-R8: sc around. (30) (3 rounds)
FO, leaving a long tail for sewing.
Ears (Make 2, Skin Tone Yarn)
Ch 2, 3 sc in the 2nd ch from hook.
FO, leaving a long tail for sewing.
Body (Starting with Skin Tone Yarn, then Red, then Green)
R1 (Skin Tone): MR 6 sc. (6)
R2 (Skin Tone): inc in each st around. (12)
R3 (Skin Tone): (sc, inc) x 6. (18)
R4 (Skin Tone): sc around. (18)
Change to Red Yarn.
R5 (Red): BLO sc around. (18)
R6 (Red): sc around. (18)
R7 (Red/Green): 10 sc in Red, 8 sc in Green. (18) (Carry unused yarn along inside stitches)
R8 (Red/Green): 9 sc in Red, 9 sc in Green. (18)
R9 (Red/Green): 8 sc in Red, 10 sc in Green. (18)
Change to Green Yarn.
R10 (Green): BLO sc around. (18)
R11-R12 (Green): sc around. (18) (2 rounds)
R13 (Green): (sc, dec) x 6. (12)
Start stuffing lightly.
FO, leaving a long tail for sewing to the head.
Arms (Make 2, Starting with Skin Tone Yarn)
R1 (Skin Tone): MR 5 sc. (5)
R2 (Skin Tone): sc around. (5)
Change to Red Yarn.
R3-R6 (Red): sc around. (5) (4 rounds)
FO, leaving a long tail for sewing. Do not stuff.
Legs (Make 2, Starting with Skin Tone Yarn)
R1 (Skin Tone): MR 6 sc. (6)
R2 (Skin Tone): sc around. (6)
Change to Green Yarn.
R3-R5 (Green): sc around. (6) (3 rounds)
Change to White Yarn.
R6 (White): sc around. (6)
Change to Red Yarn.
R7 (Red): sc around. (6)
R8 (Red): (dec, sc) x 2. (4)
Stuff lightly, especially the foot part.
FO, leaving a long tail for sewing.
Assembly
1. Hair: Sew the black hair piece to the top of the head.
2. Facial Details: Using black embroidery floss, embroider small eyebrows above the safety eyes. You can also embroider a small mouth with pink or skin tone yarn if desired, though the original image does not clearly show a mouth.
3. Ears: Sew the ears to the sides of the head, aligning with the bottom of the eyes.
4. Body to Head: Carefully sew the body to the head using the tail from the body.
5. Arms: Attach the arms to the sides of the body, just below the neck.
6. Legs: Sew the legs to the bottom of the green shorts part of the body.
7. Details: Using yellow yarn, embroider the number ‘7’ on the red part of the shirt and again on one of the green shorts.
8. Keychain: Attach the keychain ring to the top of the head, ensuring it’s securely fastened.