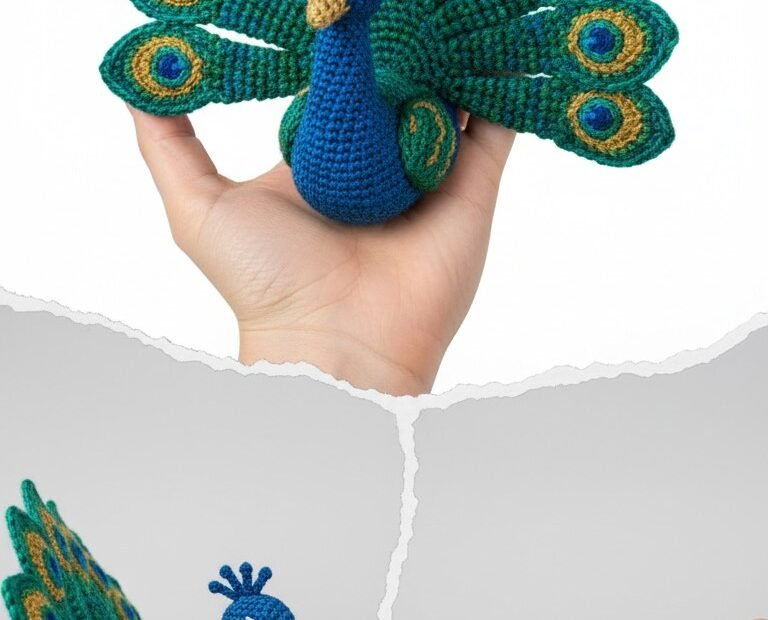
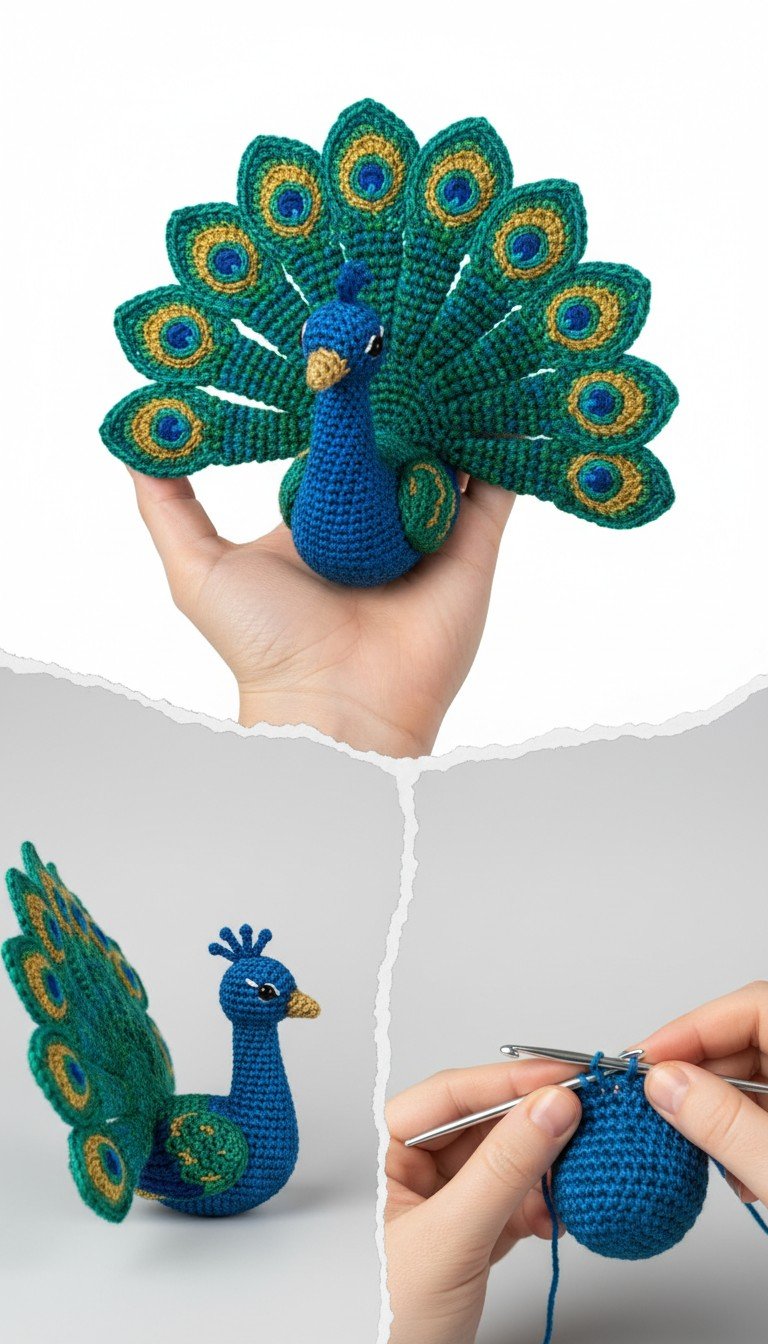
Bring the grandeur of a peacock into your home with this magnificent amigurumi pattern! This detailed guide will walk you through creating a vibrant, feathered friend, complete with its iconic fanned tail. Perfect for adding a touch of majestic beauty to any space or as a cherished handmade gift, this project is sure to delight.
Why You’ll Love Crafting This Majestic Amigurumi Peacock
There’s something truly captivating about the elegance of a peacock, and now you can capture that beauty with yarn! This pattern offers a rewarding challenge for crocheters of various skill levels, resulting in a stunning decorative piece. Imagine the joy of seeing your finished peacock proudly displayed, a testament to your creative skill and patience.
Crochet Pattern: Stunning Crochet Peacock Amigurumi Pattern: Craft Your Own Majestic Bird!
Materials
DK weight yarn in Royal Blue (main color), Teal Green, Gold/Yellow, Black, White (for eye reflection)
2.5mm crochet hook
8mm safety eyes
Polyester fiberfill for stuffing
Yarn needle
Stitch markers
Scissors
Abbreviations
MR: Magic Ring
ch: chain
sc: single crochet
inc: increase (2 sc in one stitch)
dec: decrease (sc two stitches together)
sl st: slip stitch
FO: Fasten off
st(s): stitch(es)
R: Round/Row
hdc: half double crochet
dc: double crochet
trc: treble crochet
Instructions
Gauge: Not crucial for this project, just ensure tight stitches to prevent stuffing from showing.
Notes: Work in continuous rounds unless otherwise specified. Use a stitch marker to mark the first stitch of each round.
Body & Head (Royal Blue)
R1: MR, 6 sc (6)
R2: 6 inc (12)
R3: (1 sc, 1 inc) x6 (18)
R4: (2 sc, 1 inc) x6 (24)
R5: (3 sc, 1 inc) x6 (30)
R6: (4 sc, 1 inc) x6 (36)
R7-R13: sc around (36)
R14: (4 sc, 1 dec) x6 (30)
R15: (3 sc, 1 dec) x6 (24)
R16: (2 sc, 1 dec) x6 (18)
R17: (1 sc, 1 dec) x6 (12) Start stuffing firmly. Continue stuffing as you go.
R18-R23: sc around (12) (Neck)
R24: (1 sc, 1 inc) x6 (18)
R25-R28: sc around (18) (Head)
R29: (1 sc, 1 dec) x6 (12)
R30: 6 dec (6) FO, weave in tail to close hole.
Beak (Gold/Yellow)
R1: MR, 4 sc (4)
R2: sc around (4) FO, leave a tail for sewing.
Crest (Royal Blue) – Make 3-4
ch 3, sl st into first ch to form a loop. FO, leave a tail for sewing.
Body Accents / ‘Wings’ (Teal Green & Gold/Yellow) – Make 2
Using Teal Green yarn.
R1: MR, 6 sc (6)
R2: 6 inc (12)
R3: (1 sc, 1 inc) x6 (18)
Join Gold/Yellow yarn.
R4: (2 sc, 1 inc) x6 (24) (Work this round loosely to create a slight ruffled edge, mimicking the image’s detail.)
FO, leave a tail for sewing.
Tail Feathers (Teal Green, Gold/Yellow, Royal Blue) – Make 15-17 (Adjust as needed for desired fullness)
Each feather is built in layers.
Center ‘Eye’ (Royal Blue) – Make 15-17
R1: MR, 6 sc. FO.
Gold Ring (Gold/Yellow) – Make 15-17
Join Gold yarn to one sc of a Royal Blue ‘eye’. Ch 1, 9-10 sc around the blue circle. Sl st to first sc. FO. (Encapsulate the blue circle)
Teal Feather Shape (Teal Green) – Make 15-17
Join Teal Green yarn to a stitch on the Gold Ring.
R1: Ch 1, 2 sc in same st, 1 hdc, 2 dc, (2 trc, ch 1, 2 trc) in next st (peak of feather), 2 dc, 1 hdc, 2 sc, sl st. (This creates an elongated teardrop shape around the gold ring).
FO, leave a long tail for sewing.
Assembly
Eyes: Insert 8mm safety eyes between R26 and R27 of the Head, about 4-5 stitches apart.
Beak: Sew the beak onto the face below the eyes.
Crest: Sew the 3-4 crest loops to the top of the head.
Body Accents: Sew the two Teal Green/Gold ‘wings’ to the sides of the body, around R10-R15, positioning them symmetrically.
Tail Feathers: Arrange the finished tail feathers in a fan shape. Start by sewing a central row, then layer feathers around it, overlapping slightly, to achieve the fanned look shown in the image. You may want to create a flat back piece (e.g., a large oval of felt or stiffened crochet) to sew the feathers onto first, then attach the entire tail assembly to the back of the peacock’s body (around R10-R12). Alternatively, sew each feather directly to the back of the body, starting with the bottom layer and working upwards. Ensure they are securely attached.
Finishing: Weave in all remaining ends. Add small white embroidery stitches to the safety eyes for a sparkle, if desired.