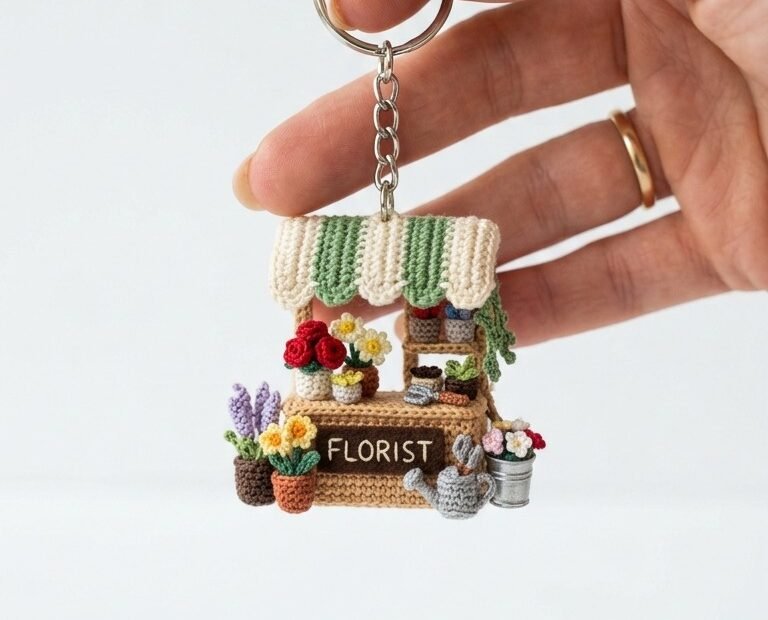
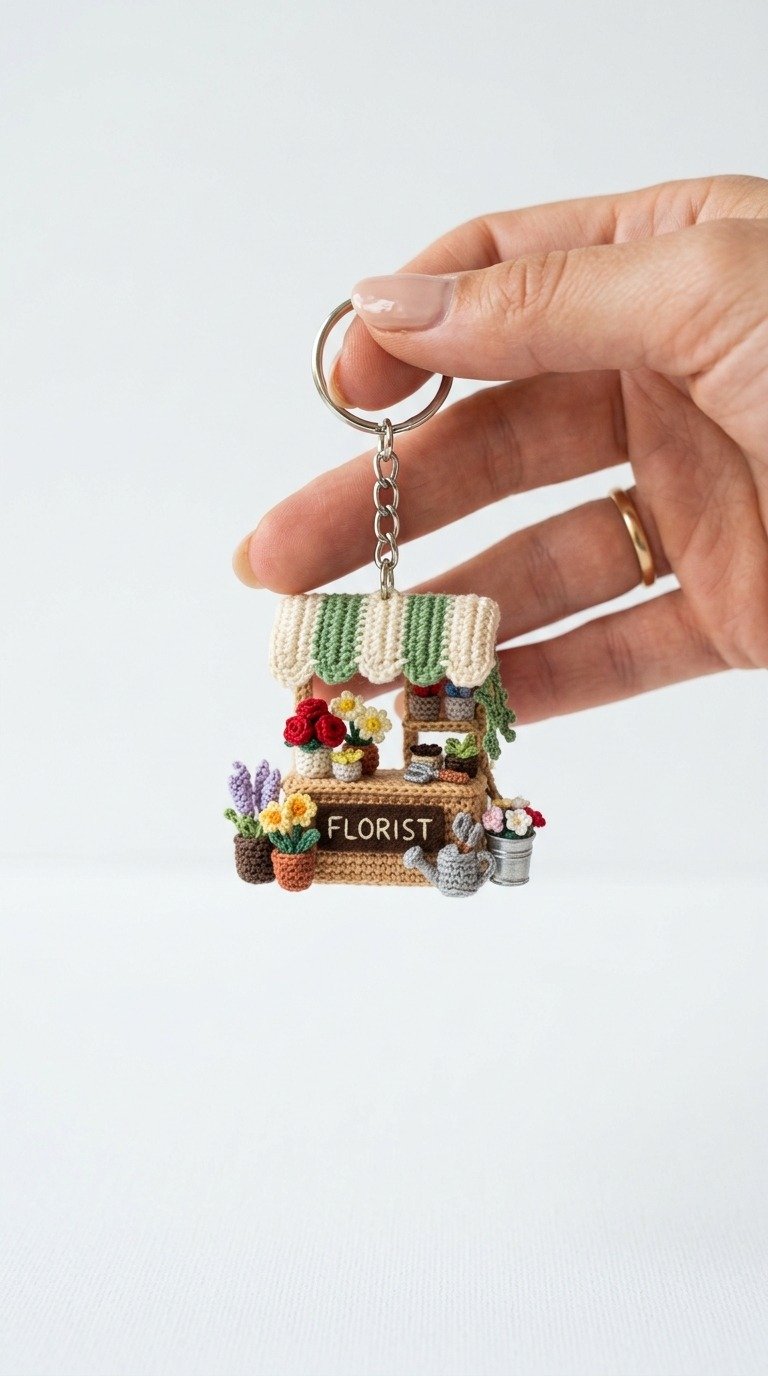
Bring a touch of botanical charm wherever you go with this adorable miniature crochet florist shop keychain! Perfect for plant lovers and micro-crochet enthusiasts alike, this tiny stall features a striped awning, a rustic wooden counter, and a colorful array of micro-potted flowers. It is the ultimate handmade accessory to personalize your keys or backpack with exquisite detail.
Why You’ll Love Crafting This Miniature Flower Stall
This miniature florist shop is a true masterpiece of micro-crochet, combining multiple elements into one enchanting scene. It offers a wonderful opportunity to practice precision stitching, color changes, and tiny assemblies. Perfect as a unique gift for gardeners or a whimsical addition to your own collection, this pattern brings the beauty of a bustling flower market to the palm of your hand.
Top and Bottom Panels (Make 2): Ch 15. Row 1-5: 14 sc, ch 1, turn. Fasten off.
Assembly: Whipstitch the panels together around a small rectangular piece of cardboard or plastic sheet. Add light stuffing before sealing completely to ensure the counter retains a sharp box shape.
Step 2: The Striped Awning (White & Green Yarn)
We will alternate colors every 2 rows to create the classic stripes.
Using White, ch 17.
Row 1-2: 16 sc, ch 1, turn.
Switch to Green, Row 3-4: 16 sc, ch 1, turn.
Switch to White, Row 5-6: 16 sc, ch 1, turn.
Repeat color switching until you have 14 rows.
Scalloped Edge: In FLO of the last row, *work 3 dc in next st, sl st in next st* repeat across to form the beautiful wavy ruffle edge. Fasten off and weave in ends.
Step 3: Support Pillars (Brown Yarn)
Make 2 pillars to hold up the awning.
Ch 12, turn and work 11 sl st back down the chain. Fasten off leaving a tail for sewing.
Insert thin jewelry wire inside the pillars if you want extra rigidity.
Step 4: Mini Flower Pots & Flowers
Flower Pots (Brown, Terracotta, or Grey): Magic ring 6 sc. R2: inc around (12). R3: BLO 12 sc. R4-5: 12 sc. Fasten off.
Tiny Lavender (Purple & Green): Ch 6 in green. Join purple yarn to top, work [ch 2, sl st in ch] 3 times to make small lavender buds.
Tiny Roses (Red & Green): Ch 10 in red, work 2 hdc in each ch. Roll the strip into a rose bud shape and secure with fabric glue. Glue into a tiny pot.
Step 5: Miniature Watering Can (Grey Yarn)
Body: Magic ring 5 sc. R2: inc around (10). R3: BLO 10 sc. R4-5: 10 sc. R6: dec 5 times (5). Fasten off.
Spout & Handle: Join yarn at the side, ch 4 for the handle, sl st back down. Join yarn on the opposite side, ch 3 for the spout, sl st back down.
Step 6: Florist Sign (Dark Brown & White Yarn)
Using Dark Brown, ch 11. Row 1-2: 10 sc. Fasten off.
Using white embroidery floss, embroider the word ‘FLORIST’ onto the brown panel.
Step 7: Final Assembly
Glue or sew the sign to the front center of the counter.
Glue the support pillars to the back-left and back-right corners of the counter.
Glue the awning securely onto the top of the pillars, curving it slightly forward.
Arrange and glue your micro flowers, potted plants, and the watering can onto the counter top.
Attach the keychain jump ring to the top center of the awning. Your miniature florist shop is complete!