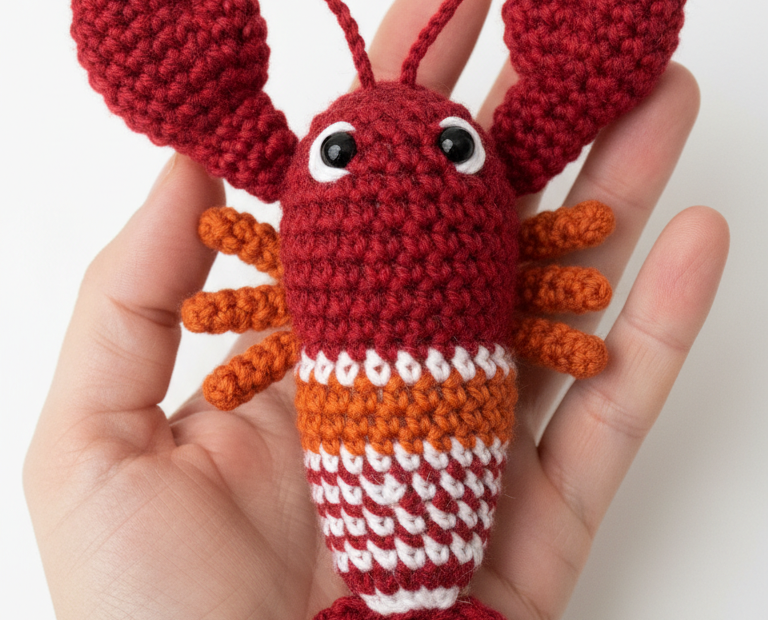
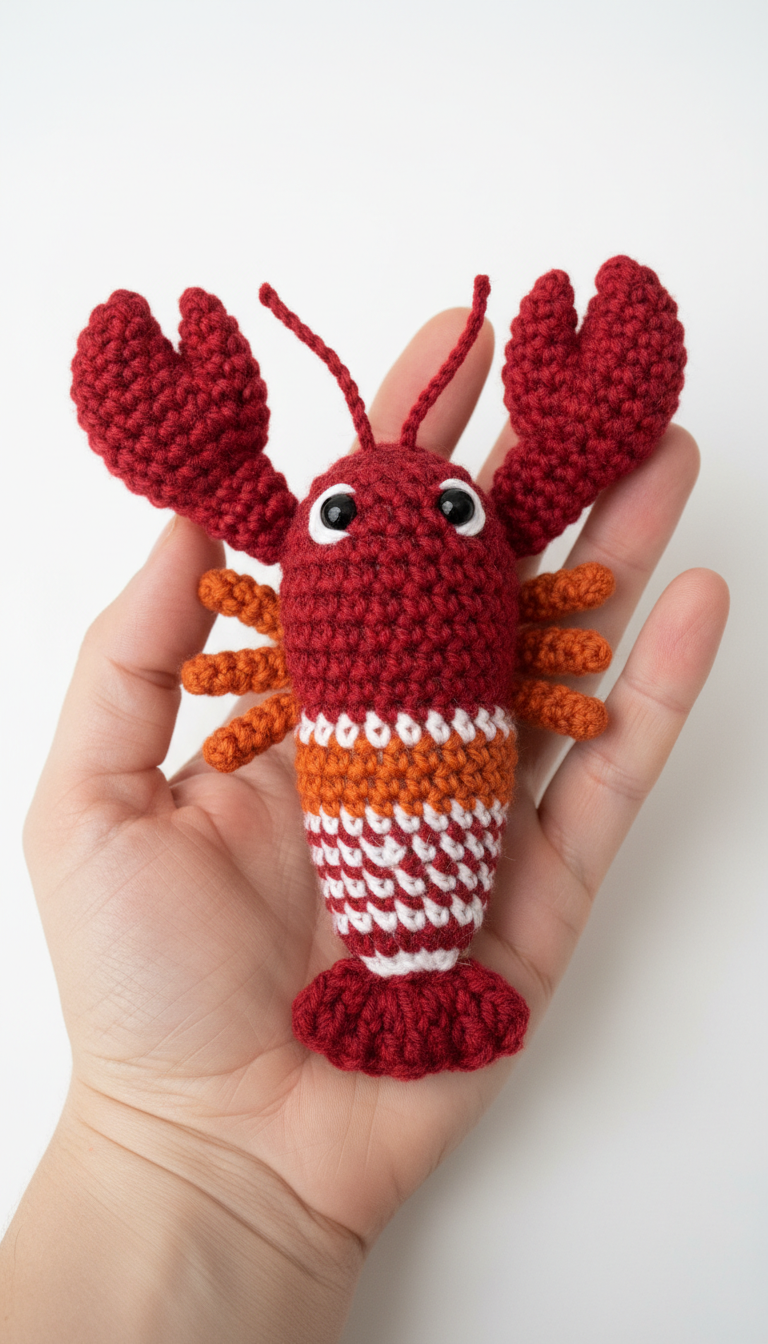
Dive into the ocean of creativity with this adorable Tiny Terrific Lobster Amigurumi! Perfect for beginners and experienced crocheters alike, this pattern will guide you through creating your very own charming, striped crustacean. With its bright colors and cute design, this little lobster makes a fantastic gift or a delightful addition to your amigurumi collection.
Craft Your Own Catch of the Day!
There’s nothing quite like the satisfaction of bringing a cute character to life with your own hands. This Amigurumi Lobster pattern is designed to be straightforward and enjoyable, offering a relaxing project that results in a wonderfully tactile and eye-catching creature. Imagine the smiles it will bring as a unique handmade present or a quirky piece of decor!
2.5mm or 3.0mm crochet hook (or hook suitable for your yarn to achieve tight stitches)
6mm safety eyes (2)
Polyester fiberfill for stuffing
Yarn needle
Scissors
Stitch marker
Abbreviations
MR: Magic Ring
ch: chain
sc: single crochet
inc: increase (2 sc in one stitch)
dec: decrease (sc 2 stitches together)
sl st: slip stitch
BLO: back loop only
FO: fasten off
st(s): stitch(es)
rnd(s): round(s)
**: repeat instructions between asterisks
Instructions
Gauge: Not crucial for this project, but aim for tight stitches so the stuffing doesn’t show through.
Body (Starting with Red)
Rnd 1: 6 sc in MR (6)
Rnd 2: *inc* x6 (12)
Rnd 3: *1 sc, inc* x6 (18)
Rnd 4: *2 sc, inc* x6 (24)
Rnd 5: *3 sc, inc* x6 (30)
Rnd 6-9: sc in each st around (30) (4 rounds)
Place safety eyes between Rnd 6 and Rnd 7, approximately 5-6 stitches apart.
Rnd 10: *3 sc, dec* x6 (24)
Rnd 11: sc in each st around (24)
Rnd 12: *2 sc, dec* x6 (18)
Rnd 13: sc in each st around (18)
Start stuffing firmly and continue to stuff as you go.
Change to White yarn.
Rnd 14: sc in each st around (18)
Change to Orange yarn.
Rnd 15-16: sc in each st around (18) (2 rounds)
Change to White yarn.
Rnd 17: sc in each st around (18)
Change to Red yarn.
Rnd 18: sc in each st around (18)
Change to White yarn.
Rnd 19: sc in each st around (18)
Change to Red yarn.
Rnd 20: *1 sc, dec* x6 (12)
FO, leaving a long tail for sewing. Finish stuffing and close the opening by weaving the tail through the front loops of the remaining stitches and pulling tight.
Claws (Make 2 – Red)
Rnd 1: 6 sc in MR (6)
Rnd 2: *inc* x6 (12)
Rnd 3-5: sc in each st around (12) (3 rounds)
Rnd 6: *sc, dec* x4 (8)
Stuff lightly.
Rnd 7: *dec* x4 (4)
FO, leaving a long tail for sewing. Close the opening.
Legs (Make 6 – Orange)
Rnd 1: 5 sc in MR (5)
Rnd 2-3: sc in each st around (5) (2 rounds)
FO, leaving a long tail for sewing. Do not stuff.
Antennas (Make 2 – Red)
Ch 10.
Sl st in 2nd ch from hook and in next 8 chs. (9 sl sts)
FO, leaving a long tail for sewing.
Tail Fin (Red)
Ch 8.
Row 1: sc in 2nd ch from hook and in next 6 chs. Ch 1, turn. (7)
Row 2: 7 sc. Ch 1, turn. (7)
Row 3: inc, 5 sc, inc. Ch 1, turn. (9)
Row 4: 9 sc. Ch 1, turn. (9)
Row 5: inc, 7 sc, inc. Ch 1, turn. (11)
Row 6: 11 sc. Ch 1, turn. (11)
Edging: Sc evenly around the entire fin, making 3 sc in each corner for a neat finish. Sl st to first sc.
FO, leaving a long tail for sewing.
Assembly
Attach Claws: Sew the two claws to the sides of the body, just behind the head, slightly angled forward.
Attach Legs: Sew the six legs to the underside of the body, three on each side, evenly spaced below the claws along the main red and orange striped sections.
Attach Antennas: Sew the two antennas to the top of the head, slightly behind the eyes.
Attach Tail Fin: Sew the tail fin to the flattened end of the body (Rnd 20 closure).