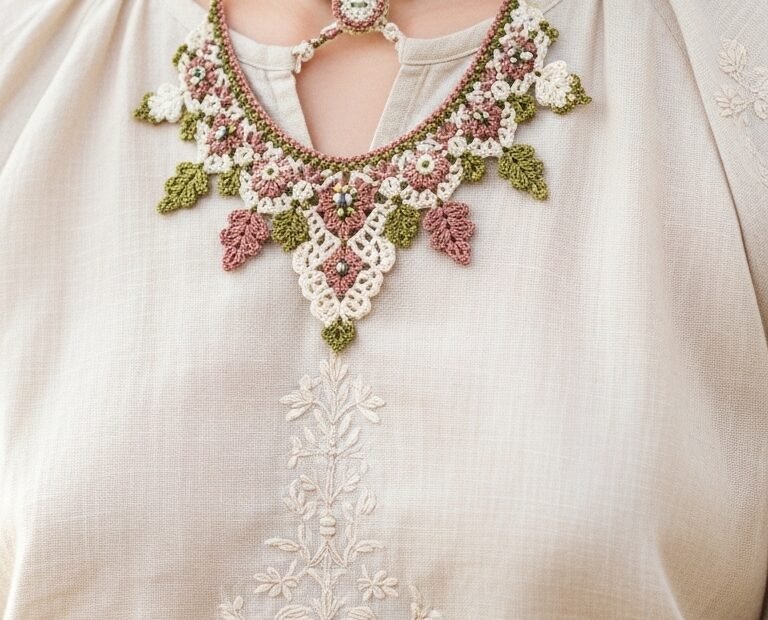
Embrace timeless elegance with our exquisite crochet lace choker necklace pattern. This piece, inspired by vintage charm, combines delicate floral motifs and graceful leaf accents in a stunning multi-layered design. Perfect for adding a touch of sophisticated handmade beauty to any outfit, it’s a project that showcases intricate crochet artistry.
Craft Your Own Statement Piece of Wearable Art
This pattern allows you to create more than just jewelry; you’ll be crafting a unique accessory that reflects your skill and personal style. The blend of dusty rose, olive green, and cream threads evokes a natural, romantic feel, making it an ideal gift or a cherished addition to your own collection. Stand out with handmade elegance.
Crochet Hook: 1.5mm (or size needed for fine thread)
Small seed beads (approx. 2mm), silver or clear
Jewelry clasp (lobster clasp or similar)
Tapestry needle
Scissors
Abbreviations
ch: chain
sl st: slip stitch
sc: single crochet
hdc: half double crochet
dc: double crochet
tr: treble crochet
sk: skip
st(s): stitch(es)
picot: ch 3, sl st into first ch
yo: yarn over
Instructions
Part 1: Main Lace Collar (Lower Layer)
This section is built from repeating lace units, incorporating flowers and leaves as you go. You will connect these units to form the full collar.
Small Leaf Motif (Make approximately 10-14 in Olive Green C)
Ch 7.
Row 1: Sc in 2nd ch from hook, hdc in next ch, dc in next 2 ch, hdc in next ch, sc in last ch. Ch 1, turn.
Row 2: Sc in first sc, hdc in next hdc, dc in next 2 dc, hdc in next hdc, sc in last sc. Fasten off, leaving a long tail for joining.
Small Floral Motif (Make approximately 8-12; use Dusty Rose B for most, Cream A for a few, with beads)
Using B (or A), ch 4, sl st to first ch to form a ring.
Round 1: Ch 1, (sc, picot) 5 times into the ring. Sl st to first sc. (Before sl st on last picot, thread a bead onto the loop, then sl st through the bead to secure). Fasten off, leaving a long tail.
Main Collar Lace Unit (in Cream A, repeat for desired collar length)
This unit forms a decorative lace segment. You will join these units as you work.
Ch 10. Sl st to form a ring.
Round 1: Ch 3 (counts as dc), 14 dc into ring. Join with sl st to top of ch 3.
Round 2: Ch 1, sc in same st, *ch 5, sk 2 dc, sc in next dc*. Repeat from * 4 times. Ch 5, sk 2 dc. Join with sl st to first sc. (5 ch-5 loops formed).
Round 3 (Adding details): Sl st into first ch-5 loop. Ch 3 (counts as dc), (2 dc, picot, 3 dc) in same loop. *In next ch-5 loop: (3 dc, picot, 3 dc). Repeat from * across. This creates a scalloped edge. As you work this round, attach the Small Floral Motifs and Small Leaf Motifs by sl stitching into a picot of the flower/leaf, then continuing your stitch into the lace unit, or by sewing them onto the lace structure using their tails, positioning them as seen in the image (e.g., leaves peeking from behind scallops, flowers in the dips).
Connecting Units: When starting a new Main Collar Lace Unit, join it to the previous unit by sl stitching into a corresponding picot or ch-space during the initial rounds, or by sewing them together securely once complete.
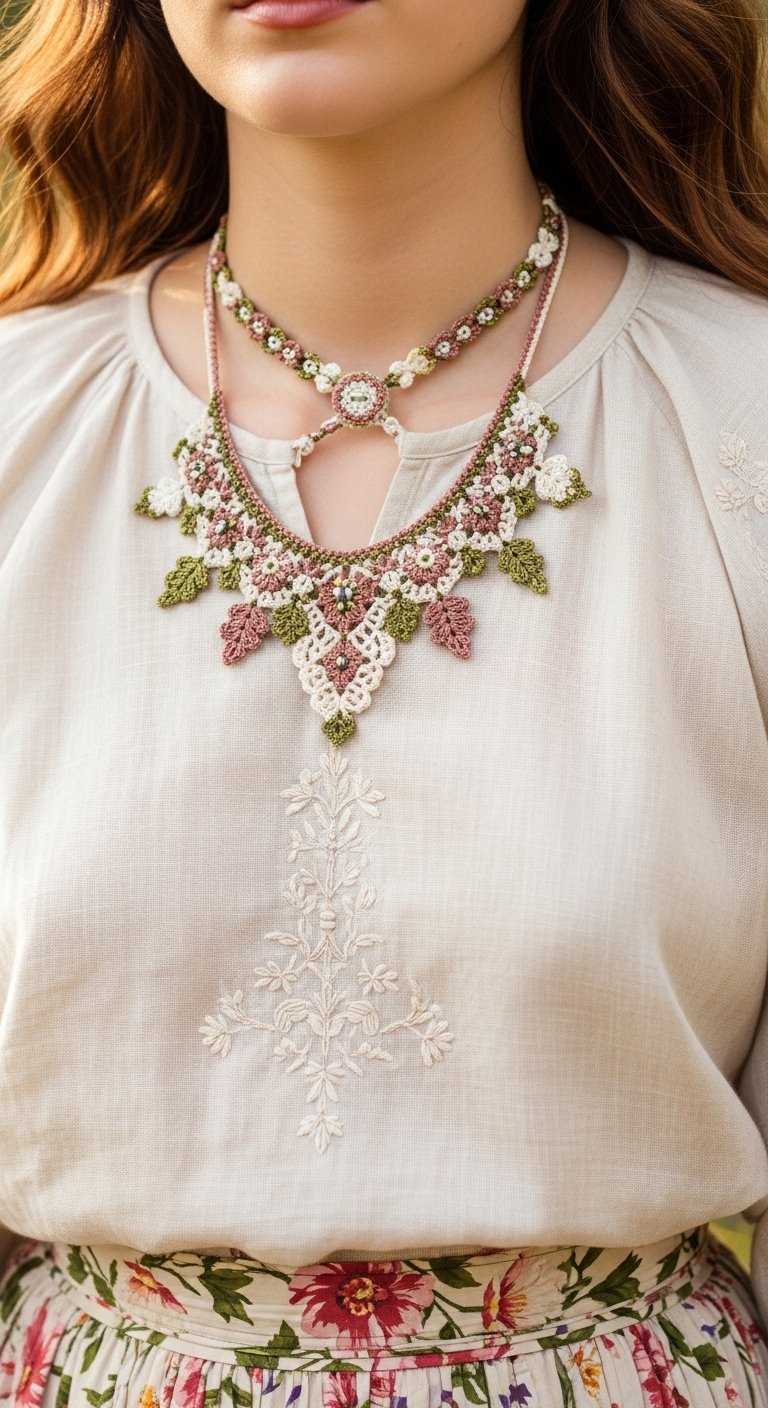
Part 2: Upper Choker (Top Layer)
Choker Floral Chain (in Cream A and Dusty Rose B, with beads)
Using Cream A, ch 4, sl st to first ch to form a ring.
Round 1: Ch 1, (sc, picot) 5 times into the ring. Sl st to first sc. (Before sl st on last picot, thread a bead onto the loop, then sl st).
Joining Motifs: Instead of fastening off, after the last sc of the first motif, ch 3, then sl st into the first sc of the next motif. Continue making motifs, joining them with ch 3 spaces. Alternate colors (Cream A and Dusty Rose B) for each successive motif.
Continue until the chain is long enough to fit comfortably around the neck as a choker (approx. 14-16 inches).
Part 3: Central Connector and Finishing
Central Beaded Ring: Using Cream A, ch 4, sl st to first ch to form a ring. Ch 1, 6 sc into ring. Sl st to first sc. Fasten off. (Before closing, thread a prominent bead onto the center of the ring).
Attach the top center of the assembled main lace collar to the bottom of this central beaded ring using sl sts or by sewing.
Attach the center of the upper choker to the top of this central beaded ring.
Sew any loose elements of the main collar together where necessary to ensure stability and structure as depicted in the image.
Attach one half of the jewelry clasp to each end of the Upper Choker chain.