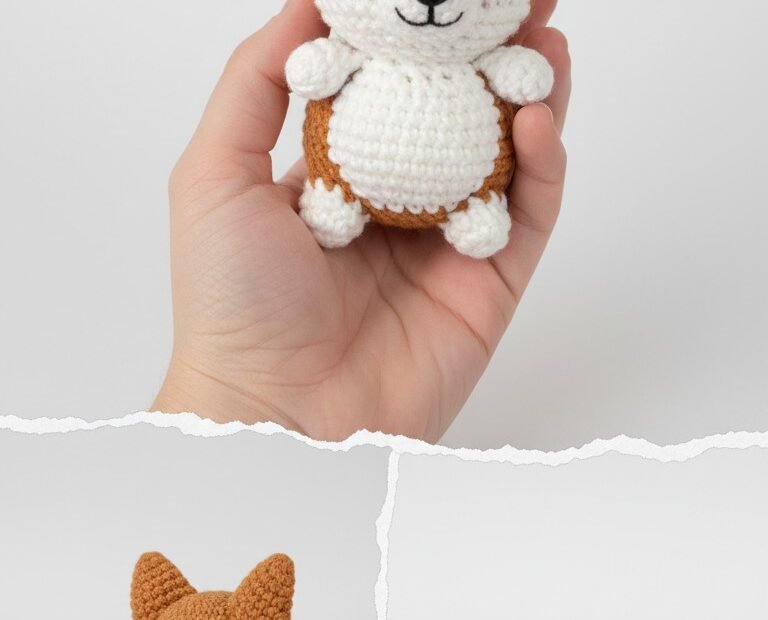
Meet Winston, the most charming little Corgi you’ll ever crochet! This amigurumi pattern will guide you through creating your own cuddly companion, perfect for gifting, decorating, or simply bringing a smile to your face. With its distinctive markings and lovable expression, this little fellow captures the true spirit of a playful Corgi. Get ready to fall in love with your new handmade friend!
Crafting Joy with Every Stitch: Why Corgi Amigurumi?
There’s something uniquely heartwarming about Corgis with their fluffy butts, stubby legs, and iconic smiles. Translating that charm into a crochet creation brings a special kind of joy. This pattern isn’t just about making a toy; it’s about creating a keepsake, practicing a beloved craft, and adding a touch of handmade cuteness to your world. Embrace the fun of amigurumi!
Crochet Pattern: Winston the Corgi: An Adorable Amigurumi Crochet Pattern
Materials
Worsted weight yarn in Fawn/Tan (main color)
Worsted weight yarn in White
Worsted weight yarn in Black (for embroidery)
2.5mm or 3.0mm crochet hook (or size suitable for yarn and desired tightness)
6mm or 8mm safety eyes
Polyester fiberfill for stuffing
Tapestry needle
Stitch markers
Scissors
Abbreviations
MR: Magic Ring
ch: chain
sc: single crochet
inc: increase (2 sc in one stitch)
dec: decrease (sc two stitches together)
sl st: slip stitch
FO: Fasten off
(X): total stitches in the round
Instructions
Head (Start with Fawn yarn)
R1: 6 sc in MR (6)
R2: (inc) x 6 (12)
R3: (sc, inc) x 6 (18)
R4: (2 sc, inc) x 6 (24)
R5: (3 sc, inc) x 6 (30)
R6-R8: Sc in each stitch around (30)
R9: 11 sc in Fawn, 8 sc in White, 11 sc in Fawn (30)
R10: 10 sc in Fawn, 10 sc in White, 10 sc in Fawn (30)
R11: 9 sc in Fawn, 12 sc in White, 9 sc in Fawn (30)
R12: (3 sc, dec) x 6 (24)
Insert safety eyes between R9 and R10 with 6-7 stitches apart in the Fawn section.
Stuff the head firmly.
R13: (2 sc, dec) x 6 (18)
R14: (sc, dec) x 6 (12)
R15: (dec) x 6 (6)
FO, weave in tail and close hole.
Ears (Make 2 – Start with Fawn yarn)
R1: 4 sc in MR (4)
R2: (sc, inc) x 2 (6)
R3: Sc in each stitch around (6)
R4: (2 sc, inc) x 2 (8)
R5: Sc in each stitch around (8)
FO, leaving a long tail for sewing. Flatten the ear.
With white yarn and tapestry needle, stitch a small inverted ‘V’ or ‘U’ shape on the inner front of each ear to create the white inner ear effect.
Body (Start with Fawn yarn)
R1: 6 sc in MR (6)
R2: (inc) x 6 (12)
R3: (sc, inc) x 6 (18)
R4: (2 sc, inc) x 6 (24)
R5: (3 sc, inc) x 6 (30)
R6: (4 sc, inc) x 6 (36)
R7-R8: Sc in each stitch around (36)
R9: Change to White yarn. Sc in each stitch around (36)
R10: Sc in each stitch around (36)
R11: Change back to Fawn yarn. Sc in each stitch around (36)
R12-R14: Sc in each stitch around (36)
Stuff the body firmly.
R15: (4 sc, dec) x 6 (30)
R16: (3 sc, dec) x 6 (24)
R17: (2 sc, dec) x 6 (18)
FO, leaving a long tail for sewing to the head.
Legs (Make 4 – Use White yarn)
R1: 6 sc in MR (6)
R2-R3: Sc in each stitch around (6)
FO, leaving a long tail for sewing. Lightly stuff.
Tail (Start with Fawn, switch to White)
R1: 6 sc in MR (6)
R2: (sc, inc) x 3 (9)
R3: Sc in each stitch around (9)
R4: Change to White yarn. Sc in each stitch around (9)
FO, leaving a long tail for sewing. Lightly stuff and flatten slightly.
Assembly
Sew the head to the body.
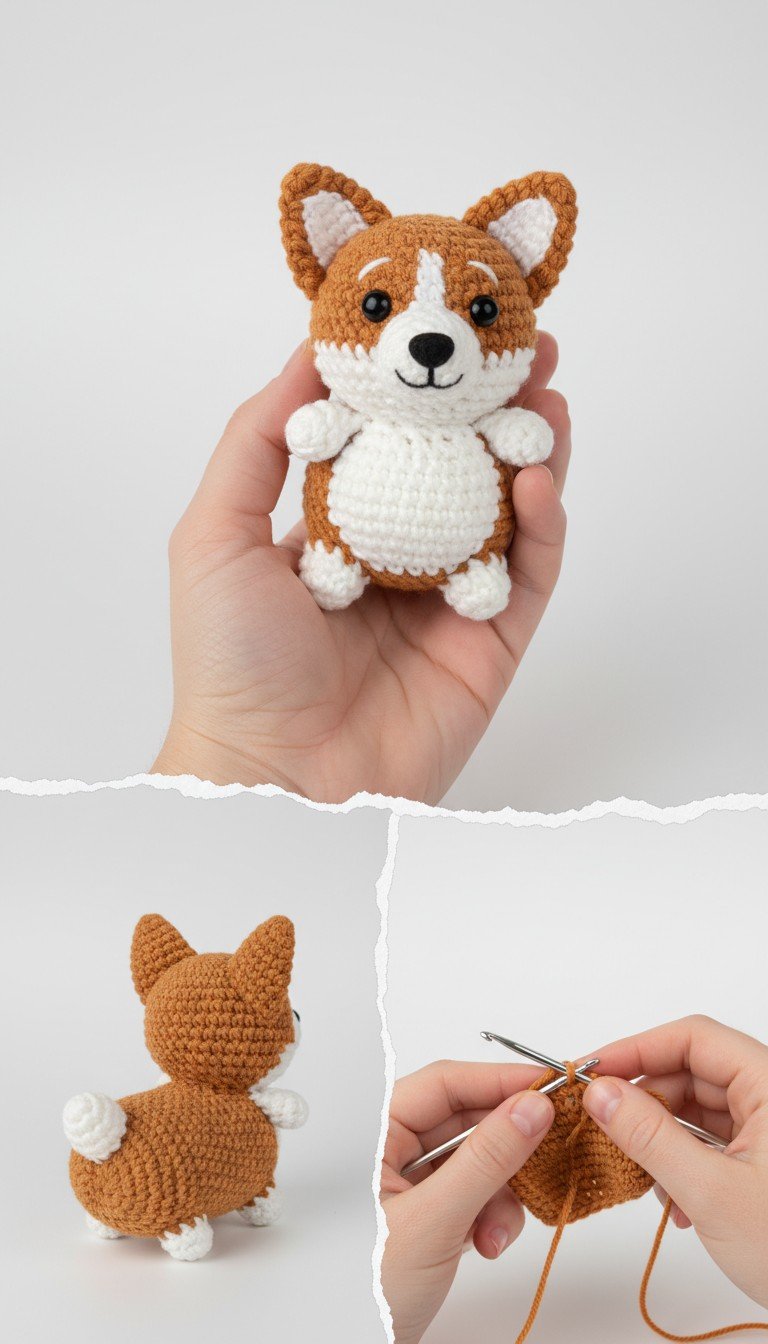
Sew the ears onto the top of the head, slightly to the sides, referring to the image for placement.
Sew the four legs to the bottom of the body, two at the front and two at the back.
Sew the tail to the back of the body, just above the white belly section.
Using black yarn and a tapestry needle, embroider a small triangular nose and a smile below the safety eyes.